To complete the assessment of a Windows device, we require you to install an agent onto the device. The agent installation is a simple task that can either be performed manually per device or can be installed via a Group Policy Object (GPO) or Microsoft Endpoint Manager (now InTune) via a new Line of Business App.
THIS IS NOT A DOUBLE CLICK TO INSTALL!
below are quick-click links to places within this document
- Manual Deployment
- Manual Deployment Easy to Follow Walk Through Guide
- MSI File
- EndPoint Manager (Intune) MSI
- EndPoing Manager (Intune) Win32 App "most reliable solution for Intune"
- Group Policy
- Qualys Removal - Uninstall
Manual Deployment of a standard .EXE file
You must have local administrative rights on the machine on which you are installing the software agent.
THIS IS NOT A DOUBLE-CLICK TO RUN APPLICATION - SEE BELOW
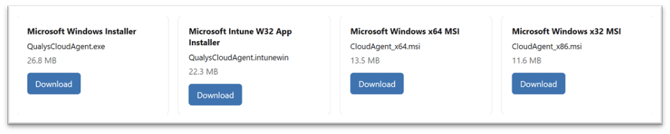
- Download the setup file from here
DO NOT DOUBLE-CLICK OR RUN THE EXE FILE DIRECTLY! - If you are not already logged in as a local administrator and will be elevating privileges to install the software, you will need to move the .EXE file to a location that the elevated account can still access.
We recommend moving the file to a folder on the C:\ drive, such as C:\_Install or C:\Temp.
Note: When you elevate privileges, the installation runs under a different user context. This means the %userprofile%\Downloads folder (where the agent is typically downloaded) may not be accessible to the elevated account, and the installer file may not be visible. Placing the file in a shared location such as C:\_Install or C:\Temp avoids this issue. - Once the file has been moved to a location that any user on the system can access, you should open an elevated Command Prompt.
To do this, search for “CMD” in the Start menu, then right-click Command Prompt and select Run as administrator. You will then be prompted to authenticate in order to elevate your privileges.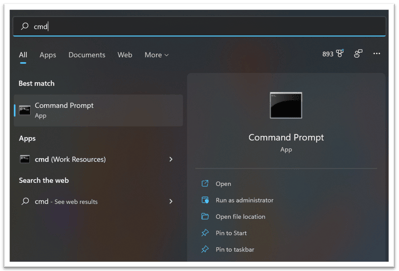
- From the command prompt, navigate to the location where you stored the .EXE file you downloaded earlier. (e.g. cd \Temp)
- You should then copy and paste the command line we have provided you in the email and run it by pressing ENTER.
QualysCloudAgent.exe CustomerId={a code will be placed here} ActivationId={a code will be placed here} WebServiceUri=https://{the URL of the test platform will be placed here/}
Where we show { and } these MUST remain as they are required, for example
QualysCloudAgent.exe CustomerId={e9b6dfdd-36b4-fd4d-8994-4f3efcc6d67a} ActivationId={b43a6b97-bc0b-5274-264d-92dceb5edc65} WebServiceUri=https://qagpublic.qg2.apps.qualys.eu/CloudAgent/
- The installation is silent and you will not see much happen after the agent is installed - please contact one of the assessment team once you have completed the installation and they will confirm that we are able to see all your devices checking in.
MSI FILE
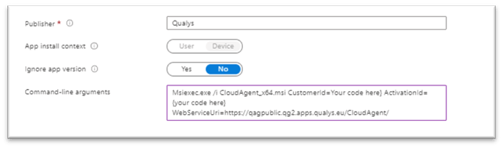
The MSI File can be used with the full command line which will include the specific command line parameters detailed within the email we sent you, prefixed by msiexec.exe /i......
Where we show { and } these MUST remain as they are required, for example:
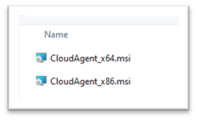
msiexec.exe /i cloudagent_x64.msi CustomerId={e9b6dfdd-36b4-fd4d-8994-4f3efcc6d67a} ActivationId={b43a6b97-bc0b-5274-264d-92dceb5edc65} WebServiceUri=https://qagpublic.qg2.apps.qualys.eu/CloudAgent/
Msiexec.exe /i CloudAgent_x64.msi CustomerId={your customer ID information} ActivationId={your activation ID information} WebServiceUri=https://qagpublic.qg2.apps.qualys.eu/CloudAgent/
Endpoint Manager Deployment
The agent can also be rolled out to your devices via Microsoft EndPoint Manager (Intune) via the Windows, Apps, Line of Business Application option.
- Download the Windows Installer File (.MSI), available here.
- Sign in to your endpoint management portal
https://intune.microsoft.com/#home
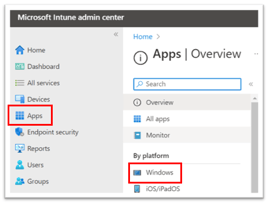
- From the left-hand menu, select "APPS"
- From the By Platform option, select "Windows"
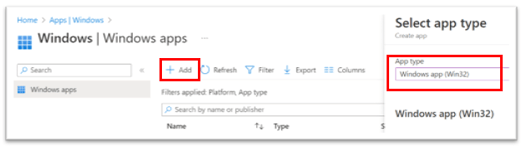
- Select "Add"

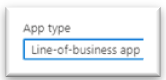
- Select "Line-of-business app" from the App Type menu
- Click "Select" to proceed
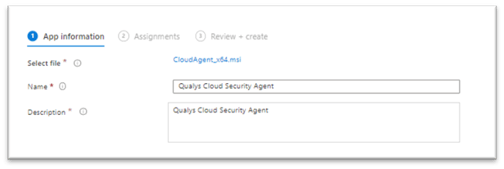
- Select your MSI file by clicking on "Select app package file"


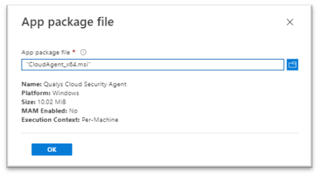
- Confirm that Endpoint Manager Add App has the correct MSI and settings (default settings on the page are OK) however, you will need to enter a publisher, type in "Qualys" and then click on "Next"
- You can now choose to deploy the MSI via "Add all devices" (easiest option) or you can add a group (if you have one with machines allocated) where this will deploy to a selected group of machines. Select an option and click "Next"


- Review all the settings for the App and click on "Create"
Endpoint Manager WIN32 App
We actually find this the most reliable method for installation of Qualys via EndPoint Manager/Intune. Download the .Intune file from here.
- Select Apps and then Windows from the Left and then Middle Menus
- Click on +Add and then select "Windows app (Win32) from the options
- Click "Select" from the option in the "Select app type" after selecting Win32 as in 2.
- Click on "Select app package file" and browse to the xxx.intunewin file, select, and click OK

- Complete any details you need to in the App Information Screen
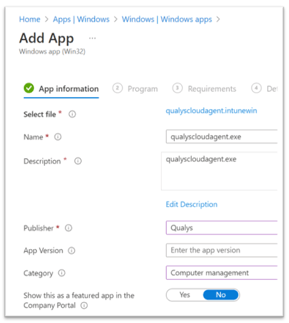
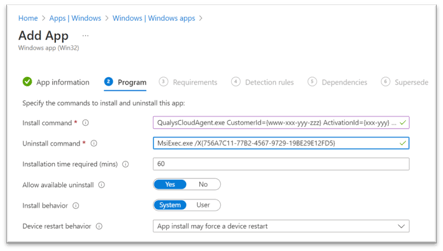
- Complete the Install command, based on the command we have shared with you and click Next
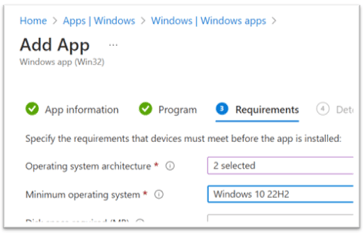
- Update your operating system details, if required and click Next
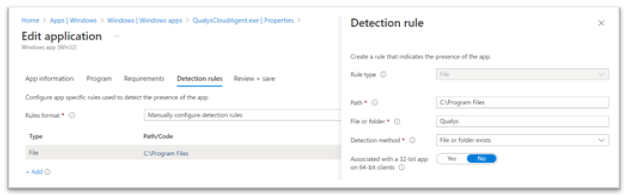
- Select "Manually configure device detection rules" and set the rules
- Skip App Dependencies - click Next
- Skip Supersedence - click Next
- Assign to either "All Devices" or a group you have pre-created or have existing in your AAD
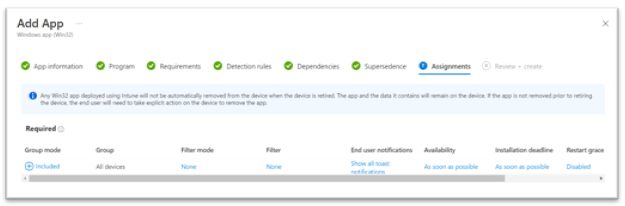
- Click next, review your settings and if you are happy, click "Create"
Group Policy Deployment
We recommend following Microsoft's own GPO deployment process - available here.
QUALYS UNINSTALL / REMOVAL
When we conclude the assessment, your assessor will select to remove you from our Qualys system. Once you are removed your installed Qualys agents will self-remove the next time they check in to the platform. This works only once, so if you have a script installing Qualys, it will reinstall and you will then have to manually remove it.
You can manually uninstall Qualys using the uninstall command from the Qualys directory on your Windows system by running the following command:
"%programfiles%\qualys\qualysagent\uninstall.exe" Uninstall=True Force=True