Windows Manual Step by Step Qualys Install
This is an easy to follow, screen by screen installation guide for the Qualys Agent
This guide is to help you with the installation of Qualys, manually, on a Windows machine.
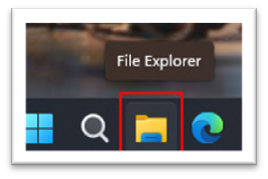
- Open File Explorer (double left-click on the yellow folder icon from the taskbar usually)
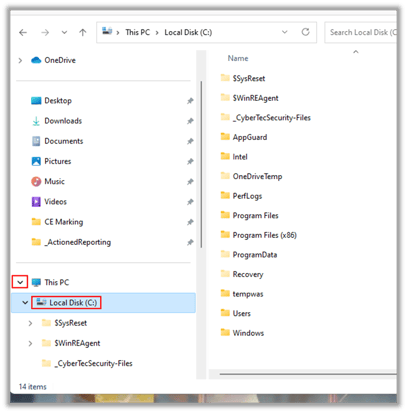
- Scroll down and expand the ‘This PC’. Then left-click once on the ‘Local Disk’
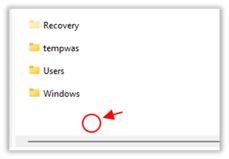
- Right-click in the white space below the folders on the right.
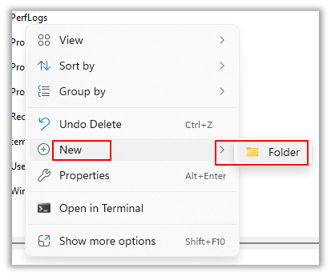
- Use the mouse to select NEW and FOLDER from the menu that is shown.
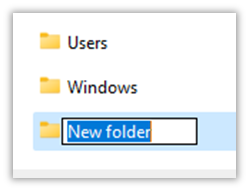
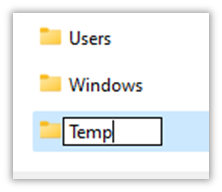
- When the new folder is created it is named ‘New Folder’. Type over this with the name ‘Temp’. Then press enter to complete.
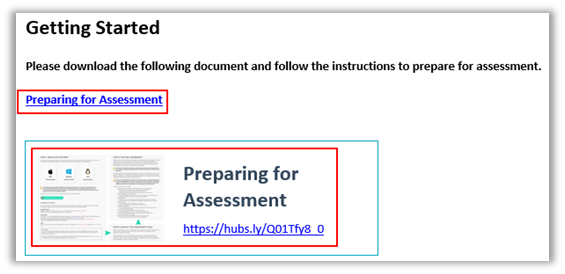
- Open the instructions email and click the link or image for ‘Preparing for Assessment’
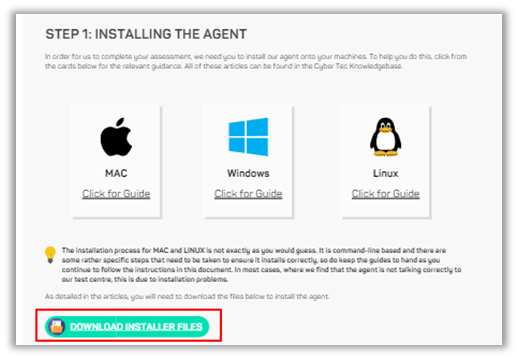
- When the guide opens, click on the green button to open the download location.
- Click the folder for the Microsoft Windows Qualys Agent
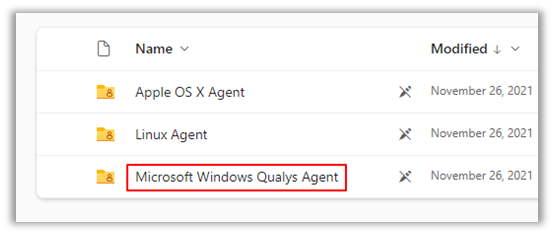
- Then click the folder for ‘Microsoft Agent’

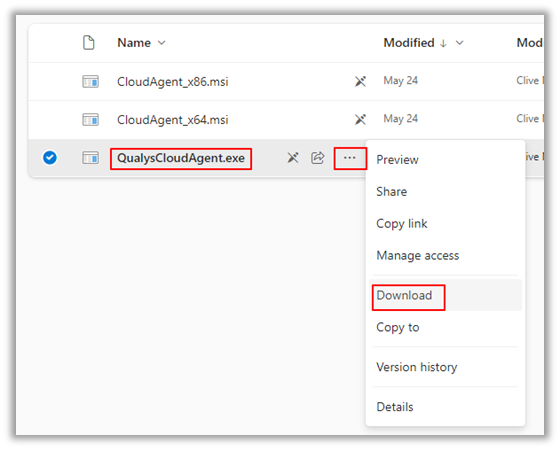
- Click the three dots next to ‘QualysCloudAgent.exe and choose ‘Download’.
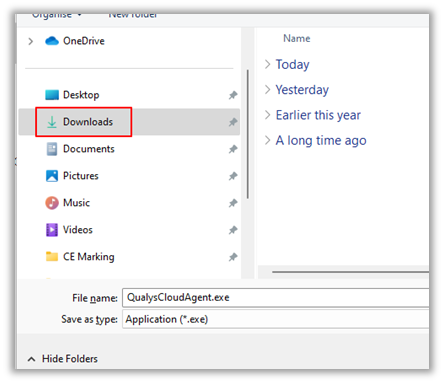
- Check that the file is saving to the ‘Downloads’ Folder and then Click ‘Save’.

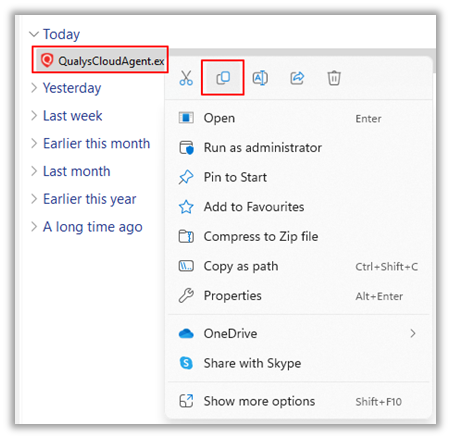
DO NOT DOUBLE CLICK TO RUN THE APP - Open File Explorer and go to the Downloads folder. Right-click on the QualysCloudAgent.exe file.
DO NOT DOUBLE CLICK TO RUN THE APP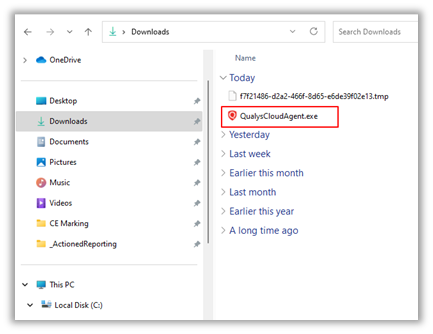
- Choose COPY (May be an icon at the top or the word COPY from the menu depending on Windows version)
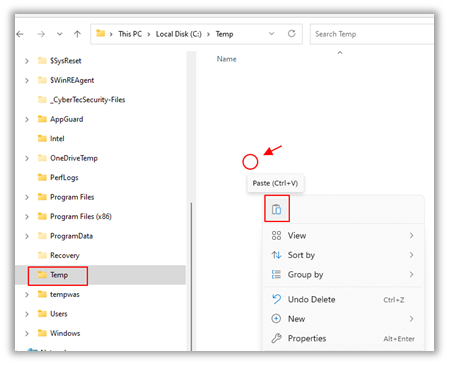
- Locate the new TEMP folder that you created by scrolling down the left and looking under the ‘Local Drive C:’ again. Left-click on TEMP. Then right-click in the open space to the right and choose ‘Paste’ – using the icon or the word ‘Paste’ from the menu if shown.
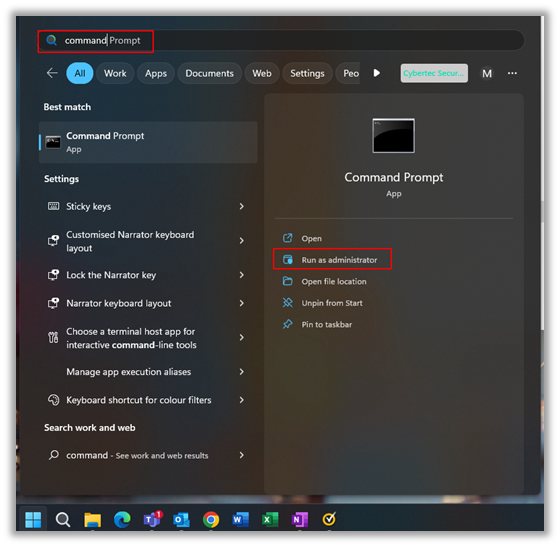
- Open the Windows Start Menu and type the word ‘Command’ in the search. Choose ‘Run As Administrator’ to open the command prompt.
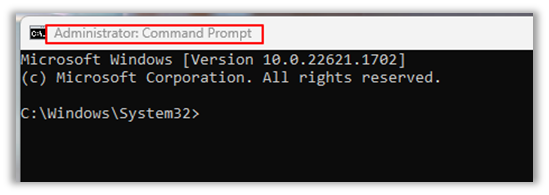
- When the Command prompt opens, it will look like this. Check that it say ‘Administrator Command Prompt’
- Type CD \Temp and press enter. The prompt will change to the folder name Temp.
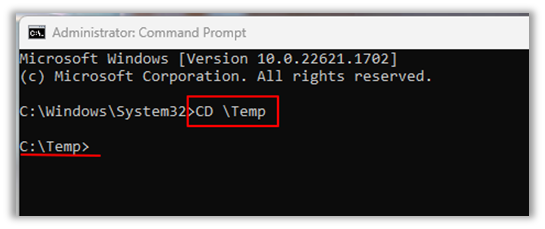
- Copy the command line in full from the instructions email. Right click in the Command prompt to paste the command and then press enter.

- If you want to check that it has installed, type ‘Services.msc’ and press enter at the command prompt.
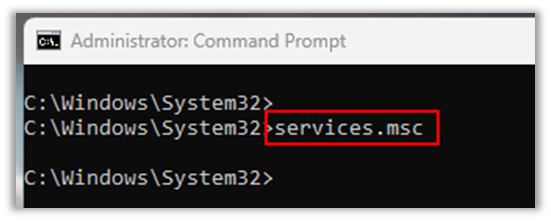
- The services window will open and you can scroll down to see Qualys Cloud Agent is running.
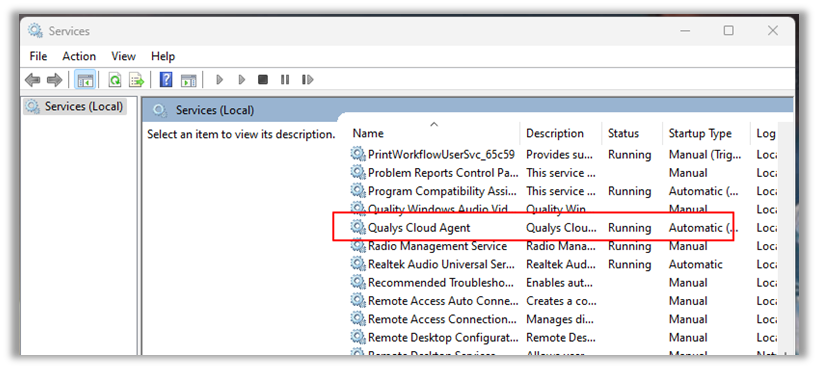
- Close Services and close the command prompt. The agent will run in the background now whenever the computer is powered on and report back every 4 hours with any vulnerabilities that need addressing.